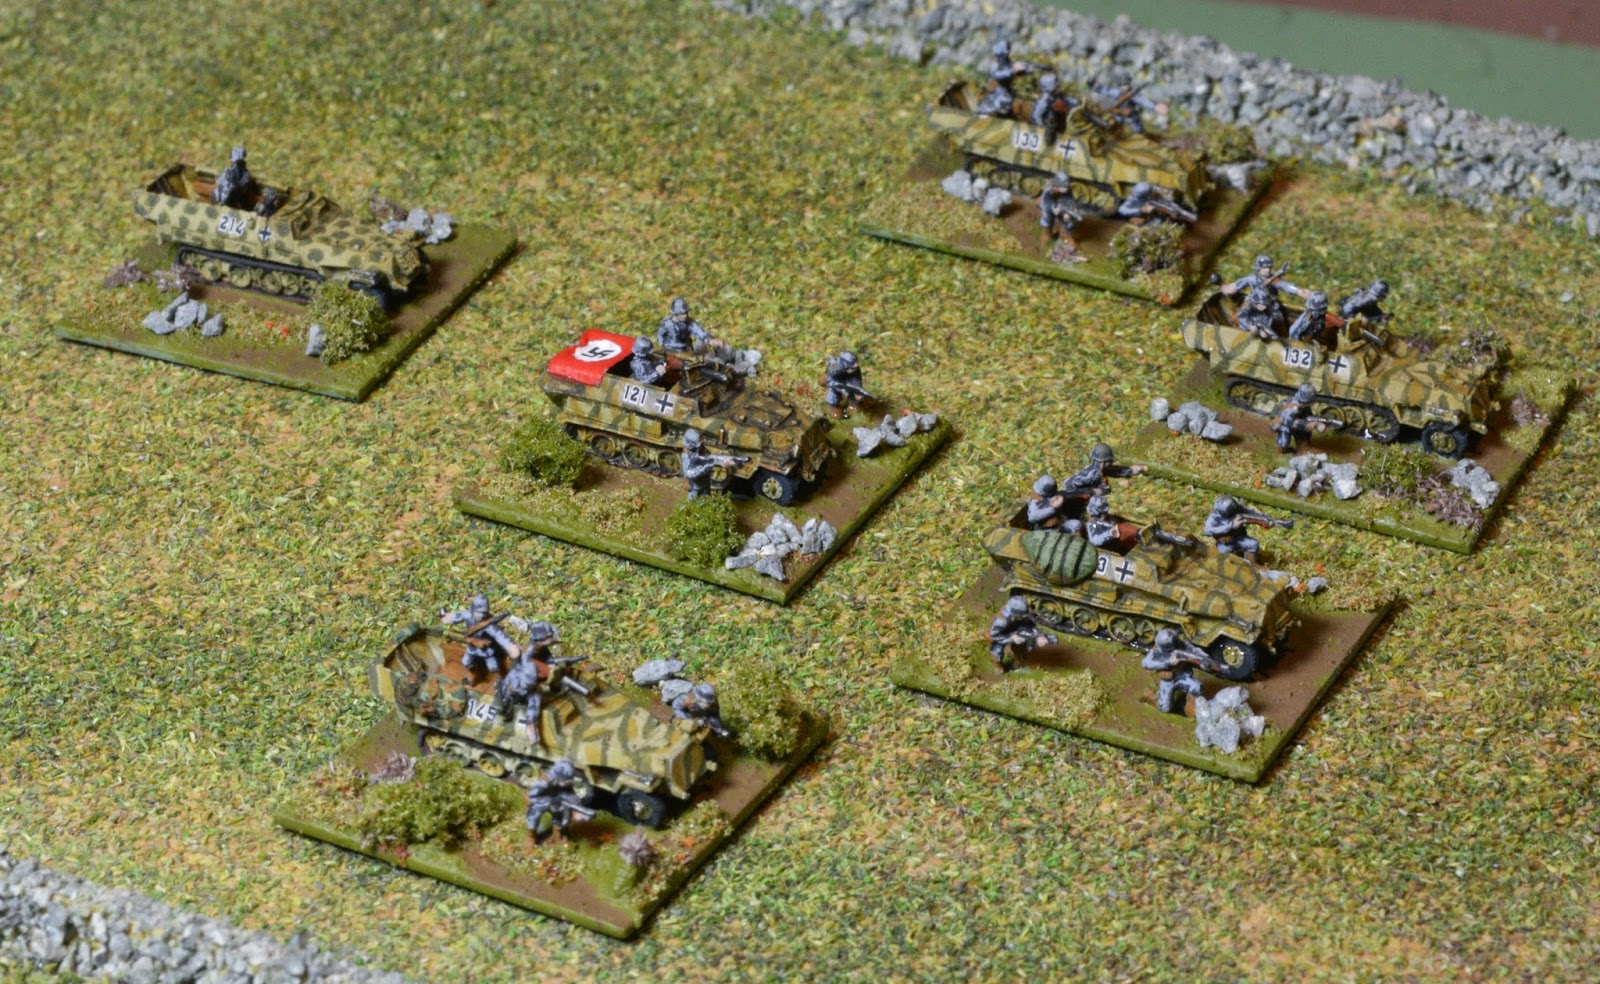
This battle was fought solo, my first full battle with the
Panzer Korps rules, including all the elements such as air strikes and weather
(though in the event it never did rain). I used 6mm figures, almost all GHQ, on
1” square steel bases (though some of my vehicles are not yet based). I used
the ground scale recommended for these small models – 1” in the rules
translated to 1cm for all purposes. The table was three feet by five. The
scenario is very suitable for solo play, as the Germans have limited options,
and once entrenched they do not want to be moving around very much. Overall
this was tremendous fun, a beautifully balanced fight in which I was convinced
from time to time that the British would win easily, then that they had no
chance, until finally it all came down to one Decision Die roll in the very
last turn of the final Day Segment, as 20:00 struck.
For those unfamiliar with these rules, the day is divided
into two-hour Day Segments within which there are a variable number of games
turns. DMs are Disorder Markers, which are the measure of damage on battalions.
Too many DMs and it may panic, and after, typically, three panics the formation
will retreat off the field.
To win the British needed to drive about three miles south
to the river Odon and capture at least one of the three bridges, as well as the
closest town to that bridge. They had two Infantry Brigades (44th
and 46th) each with three infantry battalions, a battalion of
Churchills and two artillery battalions. They also expected reinforcements in
the shape of 29th Armoured Brigade, with three Sherman battalions,
one of Cromwells, a mechanised infantry battalion and a battalion of Sextons.

To stop them the Germans initially had two regiments (four
battalions) of SS Panzergrenadiers, plus a battalion of Flak 88s and a Pioneer
battalion, and units of 105mm howitzers and 150mm Nebelwerfers. They planned to
make their main defence roughly along the line of the railway, with the two
battalions of 26th SS in Mondrainville and Tourville, with the
Pioneers in the woods just behind. 1/25th SS took the eastern wood north of the railway, with the 88s in the wood to the west where they would
have a good field of fire. 2/25th SS occupied Cheux – rather
isolated in their forward position, but put there to deny the British the town
and its many converging roads for as long as possible. A Panzer battalion, a
half-track Recon battalion and a unit of Wespes were expected to arrive some
time around mid-morning.
Day Segment 06:00 –
08:00. Initiative British. Visibility 18”. 3 turns. The British moved out
at 0600 with 44th Infantry Brigade on the right (west) and 44th
IB on the left. The plan was to concentrate the drive on the western flank,
take Cheux and then on to the bridges, with just a small force to demonstrate
on the left to fix the Germans there. The off board guns had three rounds of
rolling barrage, but only one found a German target, 2/25th SS in
Cheux, and the entrenched infantry took no harm. On the second turn 7th
RTR got close enough to Cheux to spot the SS and the units exchanged fire to
little effect (2DM each). In the next turn an FO with 7 RTR called in fire on
Cheux but it fell short and caused minor damage to the British tanks. 9th
RTR had now joined their comrades in front of Cheux but their joint fire still
failed to inflict much damage on the SS troops (3DM).
 |
| Cheux at the Schwerpunkt |
Day Segment 08:00 –
10:00. Initiative British. Visibility 30”. 2 turns. The British artillery
concentrated on Cheux now, and despite the entrenchments inflicted significant
damage on 2/25th SS (5DM). There was no risk of panic yet, it
takes overwhelming firepower to force an SS unit to panic, and this was what the
British now brought to bear. The Glasgow and Seaforth battalions joined the two
RTR units in the attack, pouring fire into the town from the front and both
flanks, as the 2/25th truly understood the meaning of Schwerpunkt.
They finally panicked and fled, exposing themselves to more fire which caused a
further panic (18DM total). In the next turn artillery bombardment and a
Typhoon attack pushed them finally into permanent panic and they fled. However
they had held up the British advance until 10:00 and there was an unholy
traffic jam around Cheux. To the east the British were probing towards the
woods. The Humbers of 15th Recce sighted the 88s at close range;
surprisingly the powerful German guns only just managed to suppress the
armoured cars, and were themselves suppressed – they had to relocate as the
British approached to avoid being flanked, so they lost the benefit of
entrenchment. However further east the 1/25th SS opened up on the 8th
Royal Scots advancing in the open, and sent them back in panic.
Day Segment 10:00 –
12:00. Initiative German. Visibility 30”. 2 turns. To the Germans’ relief
their reinforcements turned up at the earliest possible moment – a PzIVH
battalion with an attached Tiger company, plus an elite 250/1 Recon battalion
and a battalion of Wespes. This was timely as the British were starting to sort
out the jam around Cheux, and the Churchills of 7 RTR advanced over the hill to
approach Mondrainville. However the 2/26th SS entrenched there opened
fire and panicked the tanks back over the hill. To the east the British
artillery pounded the 1/25th SS in the wood, to no effect. By
contrast the 8th Royal Scots, caught in the open by artillery and
then by fire from the 1/25th were panicked and fragmented. They were
only saved because their retreat took them out of range of the infantry, and
away from the aiming point of the bombardment.
 |
| The British prepare to attack Mondrain |
Day Segment 12:00 –
14:00. Initiative German. Visibility 30”. 3 turns. Now it was the turn of
the British to have their reinforcements turn up promptly; the 29th
Armoured Brigade with four tank battalions, a mechanised battalion of the Rifle
Brigade and a battalion of Sextons. 2nd Fife & Forfar and the
Rifles went to help on the eastern side, the rest followed up the main push
past Cheux. Over the two hours the British approached Mondrainville, but it was
slow going, especially for the infantry. 2/26th SS started taking
serious damage, first 8DM then 12, but still no panic. By contrast the Shermans
of 2nd Fife and Forfar took 3DM from 1/25th SS and
panicked back. SS troops in good cover are very tough to shift. The tanks of
2/12th SS Pz and the elite Recon battalion moved up to the gap
between Mondrainville and Tourville.
Day Segment 14:00 –
16:00. Initiative German. Visibility 30”. 1 turn. The British artillery was
now all focussed on 2/26th SS in Mondrainville, and at last they
broke and panicked back out of the town. Then an “over” hit them and they
panicked again. 7th RTR and the Cameronians hit the elite SS Recon
battalion and surprisingly they panicked, taking 2/26th SS with them
again. Typhoons attacked the PzIVHs but to no effect. It was now 16:00, and the
British were a long way from the bridges and even further from the towns
beyond.
 |
| 23rd Hussars dash for the gap |
Day Segment 16:00 –
18:00. Initiative German. Visibility 30”. 2 turns. German artillery
panicked the Cameronians in the fields west of Mondrainville – infantry in the
open is very vulnerable to a bad cover die throw on a D4. A Typhoon squadron
attacked the SS Panzers but was driven off by an attached AA company. The
Panzers panicked 9th RTR but 7th RTR pushed the German
tanks back, and the Seaforth Highlanders swung round onto their right flank.
Suddenly a gap had opened in the German defences, and the Shermans of the 23rd
Hussars, in transit column on the Cheux road, dashed forward like a running
back going through the line. There was nothing between them and the bridge to
Tourmauville, but a roadblock prevented them reaching the bridge this turn.
1/26th SS in Tourville mounted their 251s and, helped by a free move
(the Germans were throwing good white Decision Dice) they threw themselves
across the road in front of the Hussars. In spite of the light armour on the
half tracks the Shermans were unable to do any decisive damage and the
Panzergrenadiers formed a defensive line blocking the bridge. To the west the
2/12th Panzers were being pushed steadily back; retreating across a
stream they had accumulated 15DM but still no panic.
Day Segment 18:0 –
20:00. Initiative British. Visibility 18”. 3 turns. Dusk was falling
(curiously early for midsummer in northern Europe) but three turns and the
initiative gave the British a slim chance of breaking through somewhere. 3rd
RTR which had swept up the western edge of the battlefield was threatening the
unguarded western bridge, but that was no use without taking Garvus, which was
now held by the elite Recon battalion, with the Pioneers in front by the
central bridge. 7th RTR panicked the Panzers but that only pushed
them back around Garvus, well placed as a buffer against 3rd RTR.
The best hope seemed to be a breakthrough by the Hussars in the centre, but
they failed to dent 1/26th SS and in return the Germans caused the
Sherman battalion to panic and fall right back.
Over to the east, in what was now just a sideshow, two
infantry battalions and the Shermans of 2nd Fife and Forfar attacked
1/25th SS in the woods. One battalion was pushed back but the 8th
Royal Scots charged home. The close combat was very even, 3DM each, but the
Germans had won the leadership roll so the British had to test morale, failed
and panicked back. In the end this German battalion held on in their original
entrenchments all day.
Meanwhile time was running out for the British. Artillery
fire forced the SS Pioneers to fall back across the river, but their fire at 7th
RTR caused the Shermans to retreat. 3rd RTR could not force another
morale test on the Panzers so Garvus was still solidly held.
However in the centre 6th Scots
Borderers, very footsore, had occupied Tourville, and their fire caused 1/26th
SS to panic. 9th RTR, coming up to replace the Hussars, also fired
and panicked the SS battalion again, pushing them back (still mounted in their
251s) all the way through Tourmauville and out the other side. With about 15DMs
there was no way they could recover, so the bridge and the town lay undefended
– could the British seize them before nightfall? On the last turn, 9th
RTR would have to form transit column and navigate round the roadblock and over
the bridge – too far for a single move. The red Decision Die was rolled and
came up – 6! With a Decorated Leader in the HQ unit that meant 7 Red, and a
single vital free move. 9th RTR trundled over the bridge and into
Tourmauville, and the crossing was secure for Monty’s attack on Caen.
 |
| 9th RTR occupy Tourmauville and win the game |
There was far more going on than I have put down here. The
Flak 88s held off a battalion of Cromwells all day in the central woods. The
German right flank did a fine job holding on – if they had crumbled then the
British would have swept round behind Tourville and won quite easily. In
general the German artillery did more damage, catching infantry in the open,
but the concentrated fire of 4-5 British artillery formations was crucial in
winkling SS units out of their entrenchments in the towns. I realised
afterwards that the Germans could have “won” if I had shuffled the Pioneers a
little bit east in the final turn – that would have put them just within 16” of
the Tourmauville bridge and technically the British would have failed their victory
conditions. However I didn’t, and I am glad, because that would have been a
very “gamey” way to decide the battle. As it was it felt very realistic, with
both sides exhausted but the British just managing to secure the vital
bridgehead.


 Since I have started basing my 6mm stuff on 1" square steel bases, the problem has increased. They take up more "floor space" than the models alone, and they are also unsuitable for piling up in a drawer. My current solution is a series of trays, designed to go in the "Really Useful Box" crates (I get them from Staples, I don't know if they are an own-brand). They are quite shallow, and they stack well on their own, so I don't need the crates they are designed for. I can get 4-5 bases in each section, and there are fifteen sections per tray. I label them and then subdivide as my collection expands - so I started out with one tray labelled German, then split it into German Tanks and German Infantry, and so on until I am now up to about nine trays for the Germans alone. I just keep them in a stack, and when I want to extract troops I pull out the tray I want and pick them out. Only the top tray is exposed to dust at all, and they tend to shuffle around as I use them so that's not a problem. They're not very cheap, about £5 per tray I think, but as I may be holding £100 worth of models in each tray, the cost is fairly unimportant. So far, it works for me.
 I don't claim that this is in any way original, but it does annoy me when people pontificate about how plain terrain "let's down" the well-painted models or spoils the look of the battle. I always remember that, except for genuine skirmish games, everything on the table is just a token, representing something larger, and if having landscaped terrain makes it harder to play the game, then I'll take a different route. That's also the reason that I favour counters, beads or labels as play aids on the table - again, the "look's the thing" people will anathematise this. But if having, say, a pink bead to tell you a unit is suppressed makes it easier to see at a glance what's going on, then that makes me happy. Of course people have different motives for wargaming, and if a picture-postcard set makes you happy, then I am not going to say my way is better - it just works for me.


 I’ve been playing
these rules a lot recently, they are a bit out of the usual but I really like them so I thought I would do a write up. They are a Divisional level set,
published by Hoplite Research in the US – in the UK you can get them from
Caliver where they cost me £23-50. They are written by Manny Granillo, who
provides excellent rules advice through a Yahoo group.
I’ve been playing
these rules a lot recently, they are a bit out of the usual but I really like them so I thought I would do a write up. They are a Divisional level set,
published by Hoplite Research in the US – in the UK you can get them from
Caliver where they cost me £23-50. They are written by Manny Granillo, who
provides excellent rules advice through a Yahoo group. Another key mechanism
is the colour dice system. Battalions are organised into “Force Groups” – think
Kampfgruppen or Brigades, though this is not rigid. Each turn each Force Group
rolls a Decision Die, with a few adjustments. And each force group has a
colour, from Black (best) to Yellow (worst). Your roll and the colour translate
into a number of formation orders, as well as Auto Rallies and free moves if
you are really lucky. The colour system means that a well-organised and trained
force (say German 1941) will be able to do more in less time, and be more
resilient to casualties, then a badly organised force like the Russians in the
same year. A force with a Black die will get the same effect with a 1 as a
force with a Yellow die gets by scoring 8 (requiring plusses, obviously). Use
of the colour dice, along with the quality of the Generals (from A-H), allows
for a lot of variation in army size and quality.
Another key mechanism
is the colour dice system. Battalions are organised into “Force Groups” – think
Kampfgruppen or Brigades, though this is not rigid. Each turn each Force Group
rolls a Decision Die, with a few adjustments. And each force group has a
colour, from Black (best) to Yellow (worst). Your roll and the colour translate
into a number of formation orders, as well as Auto Rallies and free moves if
you are really lucky. The colour system means that a well-organised and trained
force (say German 1941) will be able to do more in less time, and be more
resilient to casualties, then a badly organised force like the Russians in the
same year. A force with a Black die will get the same effect with a 1 as a
force with a Yellow die gets by scoring 8 (requiring plusses, obviously). Use
of the colour dice, along with the quality of the Generals (from A-H), allows
for a lot of variation in army size and quality. All these mechanisms
are quite simple, and soon become automatic – you’ll remember that your 75mm
gun rolls a D8 Fire Die, and infantry in the open roll a D4 Cover Die, so
reference to the tables is fairly rare. For me, they give a “realistic” feel
for this level of command, meaning that what happens on the table matches the
sort of Divisional encounters you read in the history books. As I said they are
well supported by the author and the Yahoo community, with many free scenarios
available. There are supplements with more collections of scenarios, TO&Es for
various combatants and a campaign system which is highly suitable for solo play
(a big plus for me). As I said at the start they take some getting into, and if
you want to grab-and-go they may not be your bag. But in my opinion they are
worth persevering with. There are few rule sets for warfare at this level, and
fewer successful ones, and for me these hit the spot.
All these mechanisms
are quite simple, and soon become automatic – you’ll remember that your 75mm
gun rolls a D8 Fire Die, and infantry in the open roll a D4 Cover Die, so
reference to the tables is fairly rare. For me, they give a “realistic” feel
for this level of command, meaning that what happens on the table matches the
sort of Divisional encounters you read in the history books. As I said they are
well supported by the author and the Yahoo community, with many free scenarios
available. There are supplements with more collections of scenarios, TO&Es for
various combatants and a campaign system which is highly suitable for solo play
(a big plus for me). As I said at the start they take some getting into, and if
you want to grab-and-go they may not be your bag. But in my opinion they are
worth persevering with. There are few rule sets for warfare at this level, and
fewer successful ones, and for me these hit the spot.


